

Last updated November 17, 2026



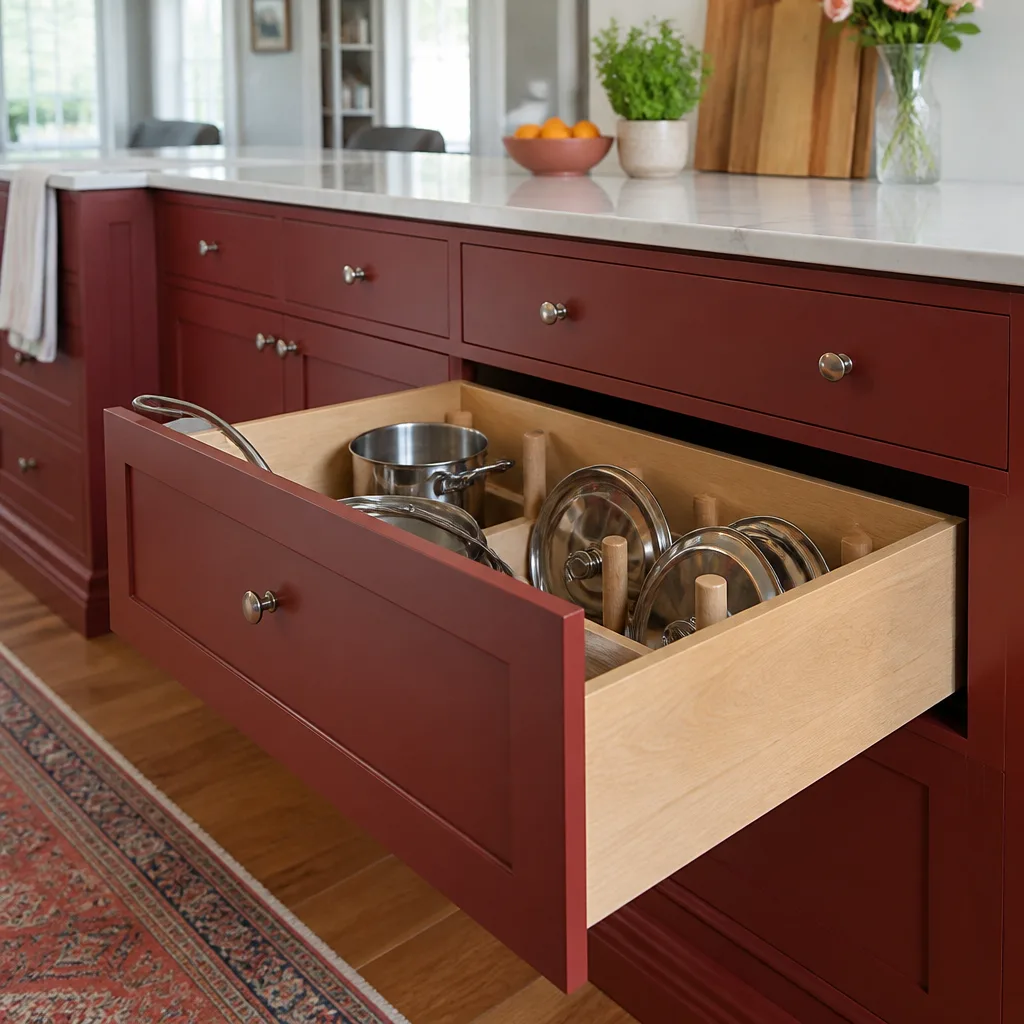




Free written scope consultation - allowances, timeline, and change-order rules on paper before a single trade is scheduled
Kitchen Remodeling Maintenance Schedule: What to Do and When
Grout doesn’t fail at year seven. It fails because nobody sealed it at week three, and then nobody re-sealed it at month twelve. The same story plays out with cabinet hinges, caulk lines, and stone counters. The first year after a kitchen remodel decides how long everything lasts, and most homeowners spend that year doing nothing because nobody handed them a schedule. This guide gives you one: what to check at 30, 60, 90, 180, and 365 days, which tasks protect your warranty and which quietly void it, and how to log it all so a Santa Clara homeowner has proof if something goes wrong.
Quick Answer
The first year of kitchen maintenance comes down to three checkpoints: at 30 days, tighten cabinet hinges and check drawer glides; at 90 days, inspect caulk lines and re-seal stone countertops; at 12 months, re-seal grout and do a full appliance and hardware review. Everything in between is light cleaning done correctly for your specific finish. Skipping these checks is the most common reason small shifts turn into warranty disputes or premature replacements.
Styles & brands we work with
- Kitchen remodeling
- Bathroom remodeling
- Home additions & ADU
- Roofing
- Windows & doors
- Driveway & pavers
- Fence
Table of Contents
- Why the First Year Matters More Than Any Other
- Month 1: The Settling Check (Day 30)
- Months 2 and 3: Caulk, Sealer, and Grout
- Grout Sealing by Material Type
- Cabinet Care by Finish Type
- Appliance Maintenance Most Homeowners Skip
- Maintenance That Voids a Warranty vs. Maintenance That Extends It
- Building a Simple Maintenance Log
Why the First Year Matters More Than Any Other
New kitchens move. Not much, and not dramatically, but they move. Wood framing dries out and shrinks slightly. Cabinet doors that hung perfectly on install day can sit a millimeter off by week six. Caulk shrinks as it cures. Grout releases a little moisture in the first months. None of this is a defect. It’s normal material behavior, and it’s exactly why the first year of maintenance matters more than any year after it.
In Santa Clara, the pattern has its own local flavor. Summers here run hot and dry, and indoor humidity drops when the AC runs through August and September. That dry air pulls moisture out of wood cabinet frames and door panels faster than in coastal cities like nearby Sunnyvale or Mountain View. We’ve watched painted shaker doors develop hairline cracks at the stile joints within a single dry season when the homeowner never ran a humidifier or wiped the doors down. It’s fixable, but it’s preventable.
The counterpoint: Santa Clara’s mild winters mean less freeze-thaw stress on exterior walls than you’d see in the Sierra foothills, so the caulk lines around your backsplash and window trim hold up reasonably well. The risk here isn’t cold. It’s dryness and neglect.
What we tell every homeowner after a kitchen remodeling in Santa Clara is simple: spend about two hours total in the first year on maintenance, and you’ll likely add years to the life of your cabinets, counters, and tile. Skip it, and you’re looking at re-caulking, re-grouting, and possibly re-sealing within 24 months at your own expense.
Month 1: The Settling Check (Day 30)
Thirty days after the final walkthrough, do a hardware and settling pass. This is the single most important maintenance visit of the entire year because it catches issues while your contractor’s workmanship guarantee is fully active and any adjustment should be free.
- Tighten every cabinet hinge screw. Open each door, hold it steady, and check the hinge plate screws with a Phillips head. A quarter turn is usually enough. Overtightening strips the wood.
- Check drawer glides. Pull each drawer fully out and push it back in. Listen for grinding or wobble. Side-mount glides may need a screw adjustment; undermount slides should be smooth.
- Test soft-close dampers. Every soft-close hinge and drawer has a small damper. If a door slams instead of easing shut, the damper needs adjustment. Our technicians set these at install, but they can drift in the first month.
- Inspect the cabinet-to-wall seams. Look at where the upper cabinets meet the wall. Any gap larger than a credit card’s thickness is worth flagging.
- Walk the countertop perimeter. Run a finger along the seam where stone meets backsplash. Feel for a lip or lift.
- Note anything that shifted. Write it in your log (more on that below). If anything on this list looks wrong, call before day 60 while it’s still a workmanship issue, not a wear-and-tear issue.
In Santa Clara, we’ve seen 30-day checks catch hinge plates that worked loose because the cabinet was installed against a wall that received direct afternoon sun through east-facing windows in the Mission City and Central Park neighborhoods. Heat cycling loosens screws faster than steady temperatures. A single tightening pass fixes it permanently in most cases.
Months 2 and 3: Caulk, Sealer, and Grout
By day 60, caulk has finished its initial cure and shrinkage. This is when you inspect every caulk line and re-seal stone.
Day 60: Caulk Inspection
Check three zones: the seam between backsplash and countertop, the seam where backsplash meets wall or window trim, and the perimeter of the sink where it meets counter. Look for separation, cracking, or discoloration. White caulk lines growing dark at the edge usually mean moisture has gotten behind. In Santa Clara’s dry climate this is less common than in coastal cities, but the kitchen sink area gets wet daily regardless of zip code.
- If caulk is intact: wipe it down with a damp cloth and mild dish soap. No re-caulking needed yet.
- If caulk is separating: call us. Under the 365-Day Done Right Promise, a failing caulk line in the first year gets re-done at no charge. That’s exactly what the guarantee is for.
- Never re-caulk over old caulk without removing it first. Layering new over old traps moisture.
Day 90: Countertop Sealer Reapplication (Stone Only)
If you have natural stone, quartzite, or any porous surface, re-apply sealer at day 90 and then every 6 to 12 months depending on use. Quartz products like Cambria, Silestone, and Caesarstone are non-porous and don’t need sealing, which is one reason we install them. If you have granite or marble, the 90-day reapplication is important: in the first year, factory-applied sealer wears faster as the stone settles into daily use.
Test whether sealer is needed: drip a few drops of water on the surface. If it beads, you’re protected. If it soaks in, seal it. For a Santa Clara kitchen where someone cooks with turmeric and red wine regularly, that test should be done every few months.
Day 90: Grout Sealing
Grout needs to cure 30 days before sealing. By day 90 it’s fully set. Apply a penetrating grout sealer designed for your grout type. Cement-based grout needs re-sealing every 12 months. Epoxy grout generally doesn’t need sealing at all, but it does need proper cleaning. See the next section for details.
Grout Sealing by Material Type
Not all grout is the same. Sealing the wrong type is a waste of time; sealing some types is a mistake. Here’s the schedule:
- Cementitious (sand-based) grout, unsanded or sanded: Seal at 90 days, then every 12 months. This is the most common grout in backsplash tile.
- Epoxy grout: Does not accept sealer and should never be sealed. Clean with a pH-neutral cleaner monthly. Re-grout or touch up every 8-10 years.
- Urethane grout: Light sealing once at 12 months, then optional. Clean with neutral cleaner.
- Single-component “sealer-as-grout” (like grout in inset lines): Skip sealer; clean monthly with a soft brush.
A practical rule: if you don’t know what grout you have, ask the contractor who installed it. In Santa Clara, we’ve seen kitchen backsplashes installed with cement grout in one tile field and epoxy in another within the same kitchen, so it’s worth checking with the installer before buying sealer.
Sealing takes about 20 minutes for a standard backsplash. Apply with a small foam brush, let it sit per the label (typically 5-15 minutes), then wipe off the excess before it dries. Over-sealing leaves a haze that’s tough to remove.
Cabinet Care by Finish Type
The wrong cleaner on the wrong cabinet finish is the most common self-inflicted damage we see. A cabinet finish isn’t just cosmetic. It’s a protective layer, and some are more delicate than others.
Painted Cabinets
Clean painted cabinets with a damp cloth and a tiny amount of mild dish soap. Wipe dry immediately, don’t let water sit. Avoid: ammonia-based cleaners, degreasers, abrasives, and scrubbing pads. Those dull the paint and, over time, leave hazy patches on high-touch doors. Grease splatter behind the range needs warm water and patience, not a stronger chemical.
Stained Wood Cabinets
Stained wood (like KraftMaid and Wellborn finishes) has a topcoat that protects the stain. Clean with a pH-neutral wood cleaner or a slightly damp cloth. Twice a year, apply a furniture-grade polish formulated for the finish. Avoid: oil soap that leaves buildup, and any polish with silicone which can yellow the finish.
Thermofoil and Laminate Cabinets
Thermofoil is a thin vinyl film over MDF. It cleans easily with a damp cloth and mild dish soap, but it’s vulnerable to heat and to seam failures. Never use an abrasive cleaner or a razor on thermofoil. The seams at door edges can lift in high heat; in a Santa Clara kitchen, that’s a real risk near ovens and ranges. Keep cabinets at least 18 inches from the cooktop unless they’re specifically heat-shielded.
Refacing and Solid Wood Fronts
For solid wood cabinet doors, dry-wipe weekly and condition yearly. Avoid standing water and never soak the door to remove grease. A wood cleaner applied to a paper towel is enough.
A product note: for any cabinet finish, check the manufacturer’s cleaning instructions. KraftMaid and Wellborn both publish finish-specific guidance, and following it is also what keeps your cabinet warranty active.
Appliance Maintenance Most Homeowners Skip
New appliances in a finished kitchen feel like the end of the project. They’re actually the start of a maintenance cycle that most homeowners neglect entirely, and that neglect is the top reason appliances fail early.
Range Hood Filter (Every 30-45 Days)
Aluminum mesh filters need degreasing. Remove the filter, soak it in hot water with grease-cutting dish soap for 20 minutes, scrub with a soft brush, and let it air-dry fully before reinstalling. A clogged filter forces the motor to work harder, which shortens its life and reduces its ability to vent moisture and grease. If you have a ductless hood with a charcoal filter, replace the charcoal every 3-6 months.
Dishwasher Door Gasket (Monthly)
Wipe the door gasket with a damp cloth and mild soap to remove food particles and residue. Check for cracks, tears, or loose sections. A failing gasket lets water leak onto floors and cabinet bases. In a kitchen with a new Santa Clara tile floor, an unnoticed leak can damage grout and cause cupping in wood subfloor. Ten seconds a month prevents this.
Refrigerator Coils (Every 6 Months)
If your refrigerator has exposed rear coils, pull it out and vacuum them with a brush attachment. If it’s a front-vent design with a kick plate or floor grille, remove the plate and vacuum the coil area with a crevice tool. Dusty coils force the compressor to run longer and use more energy. In a Santa Clara kitchen in September, longer compressor run times are already a concern.
Oven and Range Vents (Quarterly)
Wipe the oven door glass with a non-abrasive cleaner. Clean the range’s flame holes or induction surface with the manufacturers’ recommended cleaners only. Never use spray oven cleaner inside a self-cleaning oven; the high-temp cycle and the chemicals can damage the enamel.
We install Moen and Kohler fixtures frequently, and both publish recommended cleaning products for their finishes. The same principle applies here: check the manufacturer’s care sheet before using any cleaner on or near appliances.
Maintenance That Voids a Warranty vs. Maintenance That Extends It
This section is the one most homeowners need but never read. A workmanship guarantee has conditions. Our 365-Day Done Right Promise covers defects in installation and materials we supplied. It doesn’t cover damage from misuse, neglect, or a wrong cleaning product. That’s not a technicality; every honest contractor’s guarantee works this way, and it’s fair when you know the terms.
Extends your warranty:
- Sealing stone countertops at 90 days and following manufacturer care instructions
- Re-sealing grout by material type on schedule
- Cleaning cabinet finishes with the products that finish’s manufacturer recommends
- Keeping the appliance manuals and following maintenance schedules
- Replacing worn caulk with the correct product, not paint-grade caulk in a wet zone
Voids or weakens your warranty:
- Using abrasive cleaners or scrubbing pads on painted finishes, stone, or thermofoil
- Re-caulking over failing caulk without removing it first
- Allowing standing water to sit in grout or against cabinet bases
- Hanging heavy items from cabinet doors or doors that weren’t designed for the load
- Altering or adding hardware without consulting the installer
The general contractor in Santa Clara standard is simple: say the price before work starts, show up in the window, clean the site, and put the guarantee in writing. That’s the Kingswell Way. Reading your guarantee and understanding its maintenance conditions is the homeowner’s side of that agreement, and it’s worth doing before anything goes wrong.
This is also why it’s worth using a licensed contractor on any post-remodel repair. A repair by an unlicensed handyman who “fixes” a warranty issue with substandard materials can void the original guarantee. Keep your contractor’s name and number handy. If a repair fails, the free return visit is in writing, and a written guarantee plus a licensed repair is worth more than saving $50 on a shortcut.
Building a Simple Maintenance Log
In a warranty dispute, the difference between “we’ll consider it” and “we’ll fix it at no charge” is documentation. A maintenance log is the simplest possible documentation, and it takes five minutes per entry.
- Pick a format. A notebook in a kitchen drawer, a note in your phone, or a shared spreadsheet all work. The log doesn’t need to be fancy; it needs to be consistent.
- Log every entry with four things: the date, the task (e.g., “re-sealed tile grout”), the product used (e.g., “penetrating sealer, brand X”), and any observation (e.g., “grout line at back corner of backsplash looked intact”).
- Photograph anything you’re unsure about. A photo at month 3 and another at month 12 tells a better story than a description. Take a photo of the caulk line at the sink every quarter.
- Keep the receipts. Sealer, caulk, and cleaner receipts prove you did the maintenance as scheduled.
- Set phone reminders. Thirty days: hardware check. Ninety days: caulk, sealer, grout. Twelve months: full-year review.
- Review before each contractor visit. If you’re calling about a warranty issue, open the log first. A well-organized log makes our job faster and makes your case stronger.
In our experience across Santa Clara kitchens, the homeowners who keep a log rarely need to use it. The act of logging makes them notice small issues early, which is exactly the point. A schedule and a log together catch the problems before they become claims.
Common Mistakes to Avoid
- Cleaning painted cabinets with a degreaser. It’s the fastest way to dull a finish, and in a Santa Clara kitchen with a gas range, the temptation is real. Use warm water and mild soap instead.
- Skipping the 30-day tightening pass. Hinges loosen in the first month, especially in dry summer air. Ignoring it leads to door sag and a call that could have been a screwdriver fix.
- Sealing grout too soon. Sealer applied before 30 days traps moisture in cement grout. Wait until day 90 for cement grout; respect the cure time.
- Letting grease build on the range hood filter. A filter clogged with grease shortens motor life and reduces venting. Clean it monthly, not yearly.
- Using bleach on granite or quartzite. It can stain or dull natural stone. Use stone-specific cleaners only.
- Re-caulking over the old caulk line. New caulk doesn’t bond to cured caulk, and the layer beneath traps moisture. Remove, then re-apply.
- Calling about a warranty issue after the first year. The 365-Day Done Right Promise covers the first year. Report issues in the window; schedule the check-up visits before that window closes.
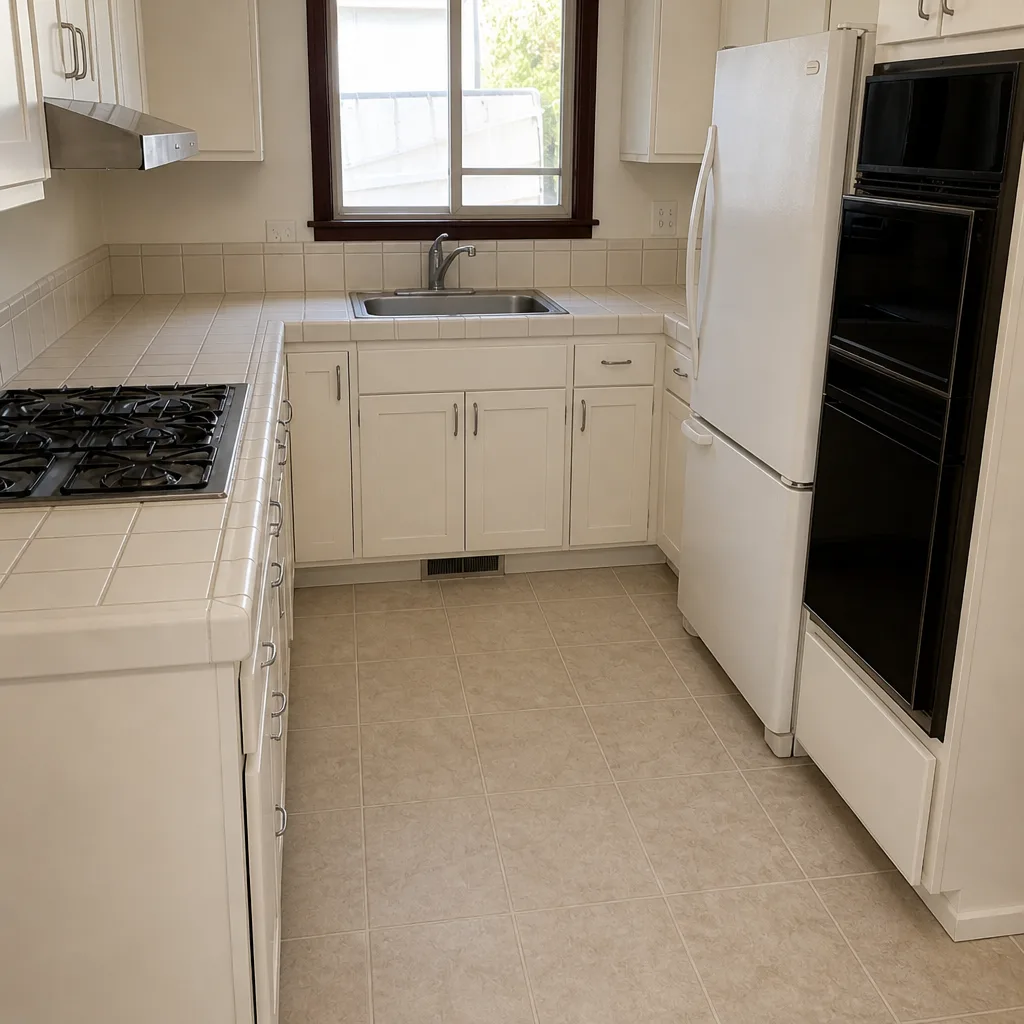
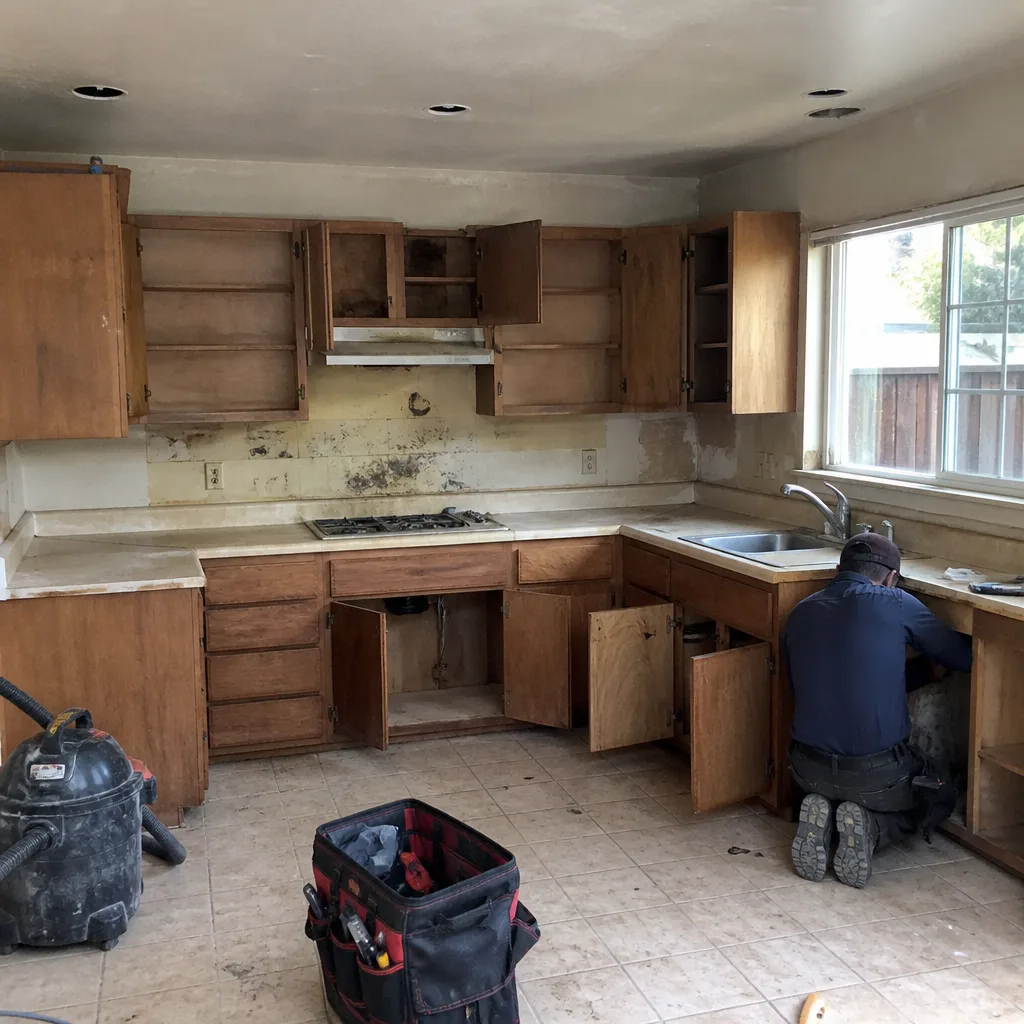
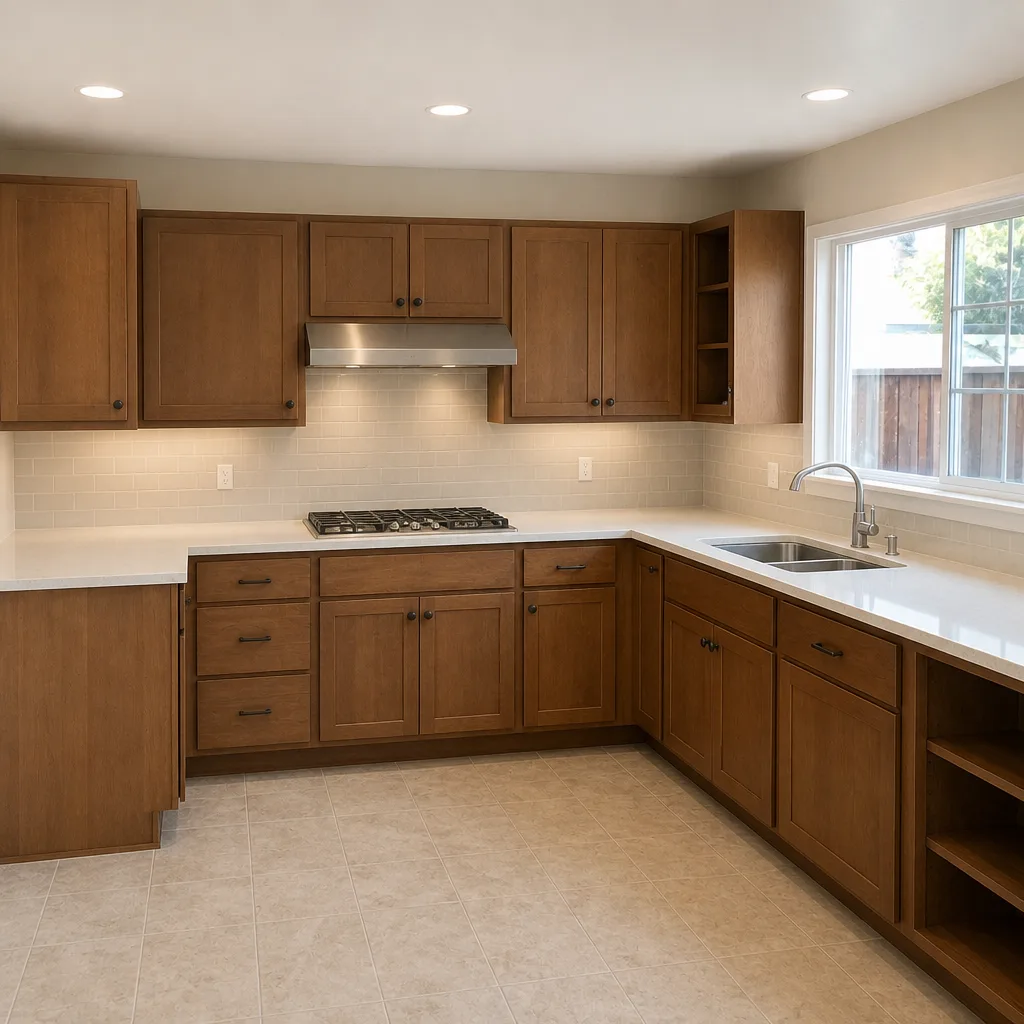
See the difference
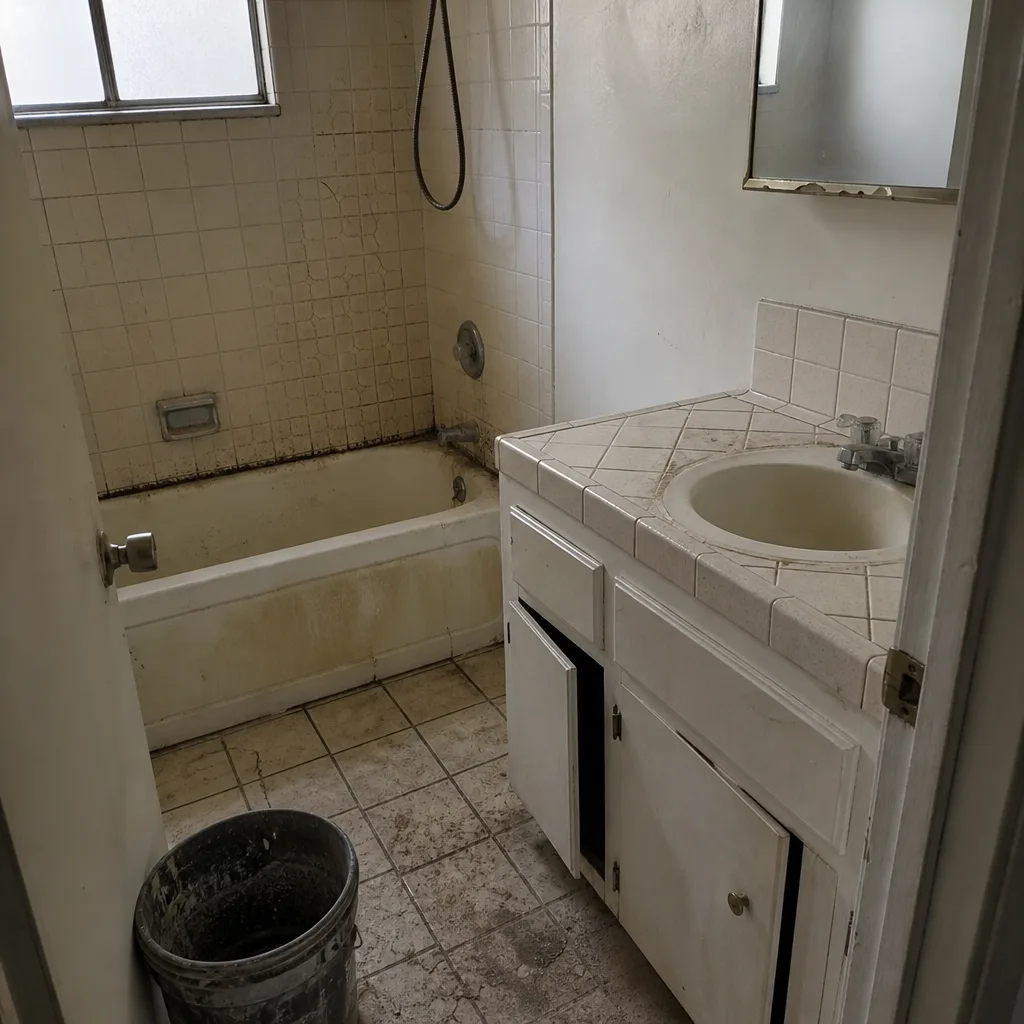 Before
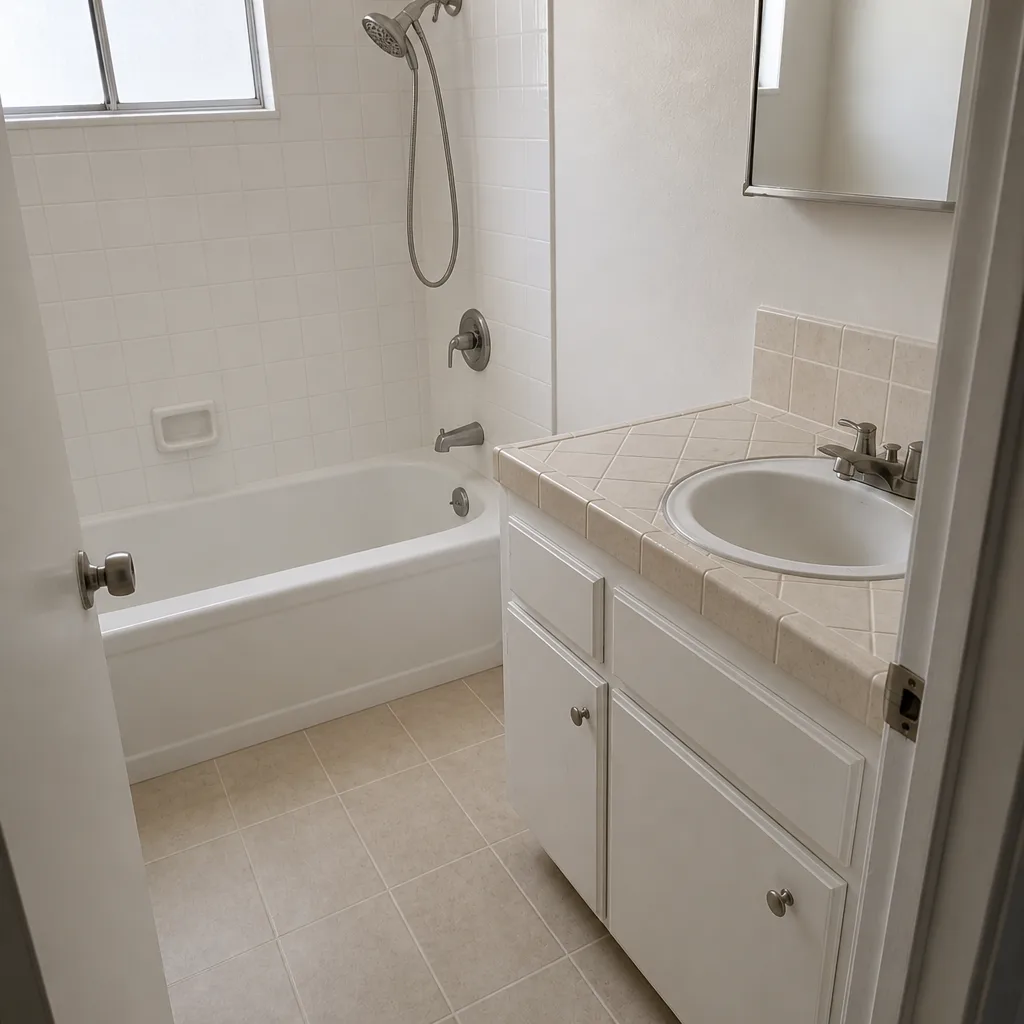 After
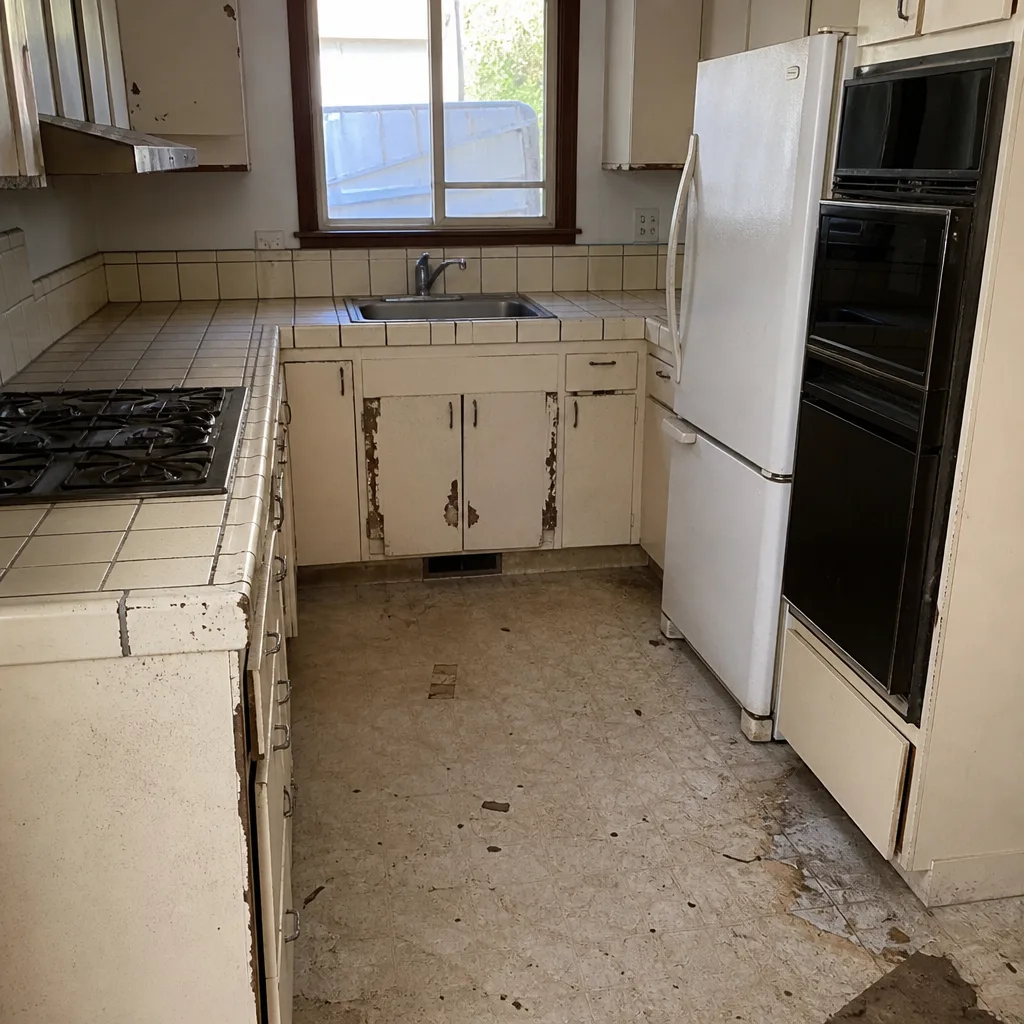 Before
 After
 Before
 After
When to Call a Professional
Some maintenance is homeowner work. Some isn’t. Call us if a cabinet door has dropped more than a quarter inch, if caulk has separated at the sink or backsplash, if the countertop has a lip you can feel, if a soft-close mechanism won’t engage, or if a floor tile or backsplash tile moves under pressure. Any of these in the first year is worth a professional visit, not a DIY attempt. For work beyond maintenance, our general contractor in Santa Clara team also handles the wider scope when a kitchen issue turns into something structural.
If you’re preparing for a full remodel in the future and not just maintenance, see bathroom remodeling in Santa Clara for how we handle a matching scope in another room. Penhallow Remodeling Santa Clara offers free estimates in Santa Clara and honors the 365-Day Done Right Promise on every project. Call (833) 400-6838 to schedule yours.
Frequently Asked Questions

Wait 30 days for cement-based grout to cure and sealer to bond properly, then seal at day 90. Epoxy and urethane grouts follow different rules: epoxy needs no sealing and should never be sealed. Call (833) 400-6838 if you’re unsure which grout you have; we can check from your project records.
No. Proper maintenance extends and protects your warranty, while neglect or wrong cleaners can weaken it. Follow the manufacturer’s care instructions for cabinets, counters, and fixtures, keep a simple log, and report anything that looks wrong before the first-year window closes. Call (833) 400-6838 for a free estimate on any maintenance-adjacent follow-up work.
Every 30 to 45 days for a kitchen used daily. Degrease the mesh filter in hot water with grease-cutting dish soap, scrub gently, and air-dry fully before reinstalling. In a Santa Clara kitchen with a gas range and regular cooking, the schedule matters: a clogged filter strains the motor. Call (833) 400-6838 for a free estimate if you’re considering a hood upgrade.
Painted cabinets need a damp cloth with mild dish soap and immediate drying; stained cabinets need a pH-neutral wood cleaner and an annual polish formulated for the finish. Thermofoil cabinets are different again and must never be cleaned with abrasives. Call (833) 400-6838 if your cabinet lines are showing wear; a free estimate on refacing or refinishing starts there.
Grout can change color in the first year due to moisture curing, UV exposure, and sealing timing. In Santa Clara’s dry summers, grout can also lighten as it fully cures. If the change is uneven or accompanied by softness, call (833) 400-6838 for an inspection. It’s better to check before a slow leak becomes a subfloor repair.
Expect roughly $150 to $400 for a full maintenance visit covering caulk, sealer, and hardware adjustment, depending on kitchen size and material type. If you’re worried about a warranty issue, the visit may be covered under your first-year guarantee. Call (833) 400-6838 for a free estimate and to confirm your coverage.
The Bottom Line
The first year after a kitchen remodel decides how long everything lasts. Spend two hours total across the year on a 30-day hardware check, a 90-day caulk-and-sealer pass, and a 12-month grout and appliance review, and you’ll likely add years to your cabinets, counters, and tile. Log every entry with a date and product name, and keep the receipts. Those five minutes a month are your documentation if a warranty issue ever comes up. And if your kitchen is still in the planning phase, Penhallow Remodeling Santa Clara home is a good place to see what a project looks like from the start.
Call (833) 400-6838 for a free estimate in Santa Clara. We’ll give you a written price before any work starts, a real arrival window, and the 365-Day Done Right Promise in writing. That’s the standard every job gets.
Written by the team at Penhallow Remodeling Santa Clara.